


 |  |
If you don’t know how to do this step, stop now, and watch some TV or something. The idea here is to buy 51R-D battery because the intake is going to take up the space that the original battery occupied. This 51R-D battery will turn sideways and sit just behind the huge wire wrap that goes from your fusebox over, and just in front of your strut tower. You’ll see later. And don’t worry about power loss, the smaller battery provides just as much power as your stocker. The battery I have I got from Autozone, and it puts out 500 cold cranking amps and 625 running amps. I’ve run all my accessories, my sound system, and my window buttons all at the same time without a problem.
You’ll first have to remove that long splashguard underneath the bumper. There are like 10 or so 10mm bolts holding it up. The next step is to remove your turn signals. There is one screw on each, and then the end closer to the center of the car pulls straight out, and then you can remove the assembly. Then you’ll need to remove the black support that your hood sits on, on top of the bumper. There are four 10mm bolts and then 4 clips and two guide rods on either end. Just get your fingers underneath the center and pull straight up. You’ll have to yank pretty hard if you’ve never taken it off before. Next there are 4 or 5 screw clips that hold the bumper to the steel reinforcement. (They are located just under the top of the grille opening.) Unscrew the thing and then pull downward. I broke all of mine so don’t feel bad if you do. Now the hard part. In-between the fenders and the bumper itself there are three 10mm bolts on each side. The studs are on the bumper itself, they stick through three holes in the fender and are held on with 3 nuts from the backside. The bottom two are fairly easy to get to, provided you’ve undone some of the inner fender liner and pulled it out of the way first. I’ll be honest with you, the top ones are a pain in the rear. I removed my side marker lenses and stuck my hand in there to hold the ratchet in place as I wrenched away. You’ll only be able to turn your ratchet one or maybe two clicks before you’ll have to go back and crank it again. With that being done the bumper just might fall off in your hands, if not, pull straight out and be careful not to let those studs scratch your fenders.

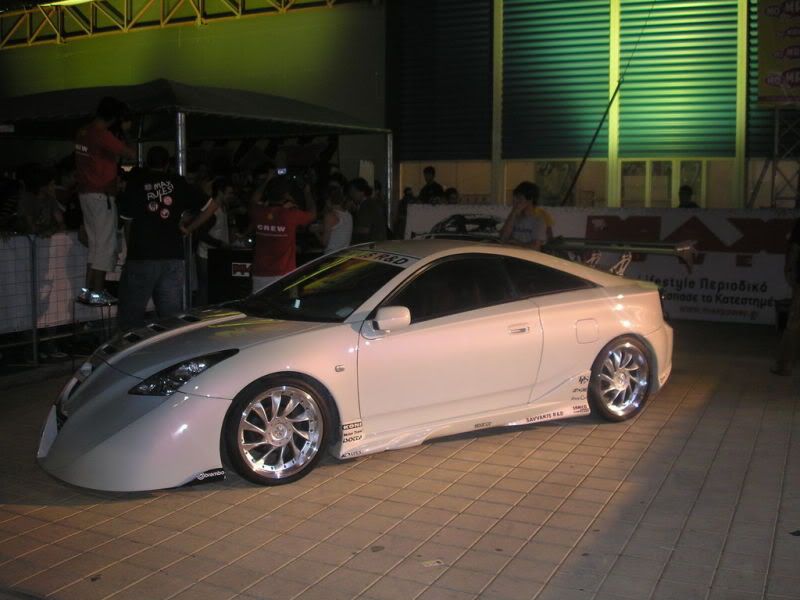
You’ve got two options here. You can remove both headlights like I did, (because personally I think it would be weird only having one high beam), or you can just remove one. With the front cap off, you can see and easily remove the 4 bolts that hold each of them on. Sit back and look at the monster you’ve created. :)
OK. You’ve got two intakes. Both of them have a long section with an almost 90 degree curve at one end. You’re going to have to cut the curve off of one, so you’ll have enough straight pipe to run it to the headlight hole. Measure off 9 ? inches of the pipe, and mark it with a sharpie. You’ll only need this much pipe to run it out the headlight hole. Now, lay the pipe down, clamp it, and use your circular saw to cut the curve off. (Save that curve though, I used mine later on.) Make sure you dispose of all the metal shavings that you just put into the pipe. The last thing you want is metal shavings in your injectors! Now put the joint on the tubes, and use two hose clamps to secure them. Then put your reducer on the curved end, and use a hose clamp to attach it. Next, put your filter on the other end and use a hose clamp to secure it also. Finally you can lay that bad boy on there and get and idea of what it will look like.


There are four snap clips that attach the top of the air box to the bottom. If you’ve replaced an air filter before you already know what I’m talking about. Undo the snaps, and then loosen the C-clamp that holds the air hose to the throttlebody. Now the top half should come off. Next, unhook the O2 sensor that sits on the bottom half of the air box on the side closest to the firewall. Just pull straight out and it should slide out. Now remove the rubber grommet that held the sensor in, because you’ll need it later. Next, remove the air filter and take a good look inside the air box. There are two or three 10mm long bolts that hold the bottom half of the air box to the frame. You’ll need an extension to take these off. Now the bottom half of the air box should come out. Don’t lose your O2 sensor!
You’ll also want to hack off the longer stem for the Honda O2 sensor. You’ll need a much bigger hole to fit the Toyota sensor. So go back to your circular saw, cut it off as close as you can to the rest of the tube, and then use your unibit to hollow it out. Take a close look at the grommet that you pulled out of the air box. You’ll need the hole in the intake a little bigger than the inner hole of the grommet. I suggest taking one level out of the intake, and then test fitting the grommet. Do this until it fits snugly.

Now that you’ve got the air box out of the way, you’ll need to relocate your ground cable to your battery. It should have been connected to the top of the core support, but since you’re moving the battery around, you’ll need to find a spot closer to the back of the car so your negative terminal will still reach. I used one of the boltholes that the air box used. Just use the same bolt that came out of the hole.

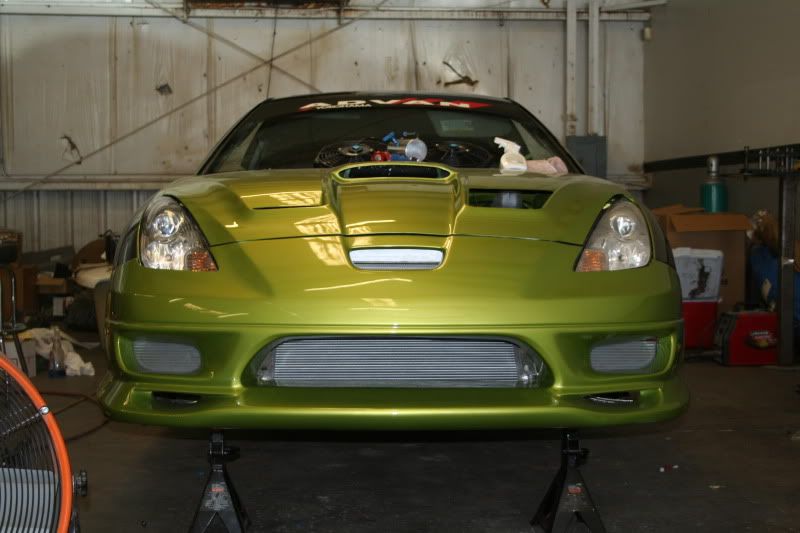
There is a small painted support that your high beam headlight used to be attached to. Well, it will be in the way of your filter, so it’s gotta come out. There are 3 or so 10mm bolts that hold it on. I took mine off and used a circular saw to cut just a few inches of it off. You still need it for your low beam lamps. And you don’t have to take the support off, get a jigsaw or something and cut it.

This is where that fuel hose comes in. You will have to relocate your radiator overflow tank in order for your intake to pass by it. It sounds a lot harder than it is. Under where your battery tray used to be, there is a bracket that holds your cruise control module (if you have cruise). You’ll need to remove that so you can get to your tank. Don’t remove any cables from the module, just unbolt the bracket and move it up out of the way. Once that’s removed, there is one 10mm bolt that holds the tank to the frame underneath the whole battery tray area. You’ll need your extension again for this one. After you take that out, your tank will drop. Trust me, there are no moving parts in the way of the tank below itself, so you don’t have to worry about the thing getting chewed up by the fan. Remove the stock antifreeze line from the tank and the radiator, and then drop the tank down until the cap is level with the battery tray area. (You might want to get to this one day, so don’t hide the thing.) Once it is in place, grab some tie wraps and find a few good places to strap the tank to. I strapped one around the neck of the tank and one through the bolthole in the side of the tank. It’s up to you where to strap it. Once you’ve done that, double check yourself to make absolutely sure it’s secure and not going to rub anything. Now attach your new longer hose to the radiator, and run it down to the tank. Simple huh?
Easy step: Set the pipe in the hole, put the hose clamps on the reducer, attach the reducer to the throttlebody, and tighten down the clamps. The next step is to put your O2 sensor back in. It may be difficult to put in, but you don’t want the thing sliding out and causing problems. If you have your oil breather handy, you can snug it down on that other hole in the top of your intake. It looks better than sticking a bolt in the hole, and it will function. Now you might notice that the pipe bends a little at the joint. I used that curve that I cut off the intake to support mine until I could make a sturdier brace for it. One option I’m looking into is getting that new APC water blow off valve. It would eliminate the issue of sucking water into your motor, and may provide a degree of bend that would be useful. Now I’ve brought up the water issue. Everyone asked me what I do when it rains. Running it in the rain is really no big deal. The filter itself will not suck water into the tube unless completely submerged. The only thing you wanna avoid is getting right behind somebody and sucking the water they throw at you, or someone hydroplaning and throwing buckets of water on your filter. And if you’re still paranoid about it, grab some masking tape and keep it in your car. You can always tape up the hole until the storm passes. I keep some in my car for when I’m washing it. I just stick some pieces over the top of the filter where it sticks out a little, and some on the inner cone. Email me if you have any more questions about this issue.


I wouldn’t worry about bolting your battery down to anything. It’s such a tight fit anyhow, the battery isn’t going anywhere. Don’t try and run your terminal cables under the pipe, run them over and everything should reach given that you’ve relocated the negative ground cable.
It goes on the same way it came off dudes! (and dudettes!)

| |
If you don’t know how to do this step, stop now, and watch some TV or something. The idea here is to buy 51R-D battery because the intake is going to take up the space that the original battery occupied. This 51R-D battery will turn sideways and sit just behind the huge wire wrap that goes from your fusebox over, and just in front of your strut tower. You’ll see later. And don’t worry about power loss, the smaller battery provides just as much power as your stocker. The battery I have I got from Autozone, and it puts out 500 cold cranking amps and 625 running amps. I’ve run all my accessories, my sound system, and my window buttons all at the same time without a problem.
You’ll first have to remove that long splashguard underneath the bumper. There are like 10 or so 10mm bolts holding it up. The next step is to remove your turn signals. There is one screw on each, and then the end closer to the center of the car pulls straight out, and then you can remove the assembly. Then you’ll need to remove the black support that your hood sits on, on top of the bumper. There are four 10mm bolts and then 4 clips and two guide rods on either end. Just get your fingers underneath the center and pull straight up. You’ll have to yank pretty hard if you’ve never taken it off before. Next there are 4 or 5 screw clips that hold the bumper to the steel reinforcement. (They are located just under the top of the grille opening.) Unscrew the thing and then pull downward. I broke all of mine so don’t feel bad if you do. Now the hard part. In-between the fenders and the bumper itself there are three 10mm bolts on each side. The studs are on the bumper itself, they stick through three holes in the fender and are held on with 3 nuts from the backside. The bottom two are fairly easy to get to, provided you’ve undone some of the inner fender liner and pulled it out of the way first. I’ll be honest with you, the top ones are a pain in the rear. I removed my side marker lenses and stuck my hand in there to hold the ratchet in place as I wrenched away. You’ll only be able to turn your ratchet one or maybe two clicks before you’ll have to go back and crank it again. With that being done the bumper just might fall off in your hands, if not, pull straight out and be careful not to let those studs scratch your fenders.
You’ve got two options here. You can remove both headlights like I did, (because personally I think it would be weird only having one high beam), or you can just remove one. With the front cap off, you can see and easily remove the 4 bolts that hold each of them on. Sit back and look at the monster you’ve created. :)
OK. You’ve got two intakes. Both of them have a long section with an almost 90 degree curve at one end. You’re going to have to cut the curve off of one, so you’ll have enough straight pipe to run it to the headlight hole. Measure off 9 ? inches of the pipe, and mark it with a sharpie. You’ll only need this much pipe to run it out the headlight hole. Now, lay the pipe down, clamp it, and use your circular saw to cut the curve off. (Save that curve though, I used mine later on.) Make sure you dispose of all the metal shavings that you just put into the pipe. The last thing you want is metal shavings in your injectors! Now put the joint on the tubes, and use two hose clamps to secure them. Then put your reducer on the curved end, and use a hose clamp to attach it. Next, put your filter on the other end and use a hose clamp to secure it also. Finally you can lay that bad boy on there and get and idea of what it will look like.
There are four snap clips that attach the top of the air box to the bottom. If you’ve replaced an air filter before you already know what I’m talking about. Undo the snaps, and then loosen the C-clamp that holds the air hose to the throttlebody. Now the top half should come off. Next, unhook the O2 sensor that sits on the bottom half of the air box on the side closest to the firewall. Just pull straight out and it should slide out. Now remove the rubber grommet that held the sensor in, because you’ll need it later. Next, remove the air filter and take a good look inside the air box. There are two or three 10mm long bolts that hold the bottom half of the air box to the frame. You’ll need an extension to take these off. Now the bottom half of the air box should come out. Don’t lose your O2 sensor!
You’ll also want to hack off the longer stem for the Honda O2 sensor. You’ll need a much bigger hole to fit the Toyota sensor. So go back to your circular saw, cut it off as close as you can to the rest of the tube, and then use your unibit to hollow it out. Take a close look at the grommet that you pulled out of the air box. You’ll need the hole in the intake a little bigger than the inner hole of the grommet. I suggest taking one level out of the intake, and then test fitting the grommet. Do this until it fits snugly.
Now that you’ve got the air box out of the way, you’ll need to relocate your ground cable to your battery. It should have been connected to the top of the core support, but since you’re moving the battery around, you’ll need to find a spot closer to the back of the car so your negative terminal will still reach. I used one of the boltholes that the air box used. Just use the same bolt that came out of the hole.
There is a small painted support that your high beam headlight used to be attached to. Well, it will be in the way of your filter, so it’s gotta come out. There are 3 or so 10mm bolts that hold it on. I took mine off and used a circular saw to cut just a few inches of it off. You still need it for your low beam lamps. And you don’t have to take the support off, get a jigsaw or something and cut it.
This is where that fuel hose comes in. You will have to relocate your radiator overflow tank in order for your intake to pass by it. It sounds a lot harder than it is. Under where your battery tray used to be, there is a bracket that holds your cruise control module (if you have cruise). You’ll need to remove that so you can get to your tank. Don’t remove any cables from the module, just unbolt the bracket and move it up out of the way. Once that’s removed, there is one 10mm bolt that holds the tank to the frame underneath the whole battery tray area. You’ll need your extension again for this one. After you take that out, your tank will drop. Trust me, there are no moving parts in the way of the tank below itself, so you don’t have to worry about the thing getting chewed up by the fan. Remove the stock antifreeze line from the tank and the radiator, and then drop the tank down until the cap is level with the battery tray area. (You might want to get to this one day, so don’t hide the thing.) Once it is in place, grab some tie wraps and find a few good places to strap the tank to. I strapped one around the neck of the tank and one through the bolthole in the side of the tank. It’s up to you where to strap it. Once you’ve done that, double check yourself to make absolutely sure it’s secure and not going to rub anything. Now attach your new longer hose to the radiator, and run it down to the tank. Simple huh?
Easy step: Set the pipe in the hole, put the hose clamps on the reducer, attach the reducer to the throttlebody, and tighten down the clamps. The next step is to put your O2 sensor back in. It may be difficult to put in, but you don’t want the thing sliding out and causing problems. If you have your oil breather handy, you can snug it down on that other hole in the top of your intake. It looks better than sticking a bolt in the hole, and it will function. Now you might notice that the pipe bends a little at the joint. I used that curve that I cut off the intake to support mine until I could make a sturdier brace for it. One option I’m looking into is getting that new APC water blow off valve. It would eliminate the issue of sucking water into your motor, and may provide a degree of bend that would be useful. Now I’ve brought up the water issue. Everyone asked me what I do when it rains. Running it in the rain is really no big deal. The filter itself will not suck water into the tube unless completely submerged. The only thing you wanna avoid is getting right behind somebody and sucking the water they throw at you, or someone hydroplaning and throwing buckets of water on your filter. And if you’re still paranoid about it, grab some masking tape and keep it in your car. You can always tape up the hole until the storm passes. I keep some in my car for when I’m washing it. I just stick some pieces over the top of the filter where it sticks out a little, and some on the inner cone. Email me if you have any more questions about this issue.
I wouldn’t worry about bolting your battery down to anything. It’s such a tight fit anyhow, the battery isn’t going anywhere. Don’t try and run your terminal cables under the pipe, run them over and everything should reach given that you’ve relocated the negative ground cable.
It goes on the same way it came off dudes! (and dudettes!)
This article explains how to install a Zex dry nos kit on a 94-99 Toyota Celica GT (equiped 5SFE engine). It is very simple, but the instructions can get quite complicated, so these instructions walk you through the installation, thoroughly explaining each step. Reading the instructions that come with Zex Nitrous Kits completely is recommended, and this article should used as a supplement to the Zex Instructions....

Nitrous Basics


I chose to locate the nitrous tank in the trunk. You may choose to locate your bottle elsewhere, the instructions should be very similar.
The kit comes with all the needed components for locating the tank in your trunk. Using the 15ft main nitrous line start with one end in the trunk. I ran the line through an existing hole under the spare tire up to the front of the car. You have the option of running the line through the interior of the car, which is much faster, however having the line under the car is safer and recommended by Zex. I zip-tied the nitrous line to the plastic bracket and followed the fuel line all the way to the engine (see image above). It helps to have someone grab the line when passing it up the port hole in your engine bay. For now leave, leave the line loose as there is quite a bit more to do =)


The NOS bottle is comparable to a can of spray paint...it needs to be upright and tilted in the right direction to work correctly. The nitrous needs to freely flow through the main line, so you will need to mount the bottle in a position where the hose is always at the bottom corner of the bottle even during acceleration. Take note that the brackets are different sizes to mount the bottle correctly. The tall bracket goes on the nozzle end of the bottle while the small bracket goes on the butt-end of the bottle.
The tank brackets can be very difficult to install. I strongly recommend that you use 2 people for this step.
to mount the bracket you need to drill 4 holes in your trunk. Be aware of what you are drilling into and what is near before you start drilling and there shouldn't be a problem.
You really can mount the tank anywhere in the trunk. I mounted the bottle to the left of my CD Changer & Amp. If it is a concern you may want to find a stealth location elsewhere into the trunk, possibly behind or under the trunk molding (if the bottle will fit), or into the particle board covering the spare.
You now need to find a place to mount the Zex Nitrous Management Unit (the sweet looking purple box.). The tubes that came with the package are way too short to mount the NMU anywhere but very close to the intake. I have an Injen intake which made it very easy to mount in the position in the pictures, however a stock intake may have trouble.
You can mount the NMU anywhere by simply buying longer stainless steel cables. The tube lines cost about 75 cents a foot and you will need 2 of 5' foot tubes.
Once you finish mounting the NMU you are ready to go to the next step.


Finding these two sensors is a bitch. This is why it took me so freaking long to install my nitrous kit....
| Fuel Regulator | |
 | Ok let's start with the fuel regulator. The fuel regulator looks like a mushroom top. If your car has a lot of mileage it will be rusted it will have one mini tube coming out if it. Compare it to the tube Zex give you...its smaller then that... Pop the stock tube off and follow the lines up to the intake those are where the 2 tubes are going to connect to. |
| Throttle Sensor | |
| The throttle sensor is located directly behind your actual throttle. It should be a plastic harness with 4 wires coming out of it (RED BLACK/WHITE BLUE/WHITE BROWN/BLACK WHITE). The throttle sensor wire is the BLACK/WHITE wire. This wire will connect the white wire on the Zex NMU so when you floor the pedal...the nitrous will activate. | |
| On the purple box (NMU) there are 2 tubes that you need to hook up. Find the vacuum hose which is connected to the fuel pressure regulator. Connect the "regulator" hose to the fuel pressure regulator. The second, "intake", hose goes to the intake manifold. |


Awww yeah...the nos switch...Everybody in New York is now telling me that nos is very illegal. I had no idea that NOS was illegal when I installed my nos...so I installed my switch in plain view. You may want to locate the switch in a slightly less obvious location. To install the switch on the dash all you need to do is pull off one of the blank tabs and hot glue the switch onto the tab.


There are 3 wires on the Zex NMU: red, white and black. The black wire is the ground so simply attach it to any part of the engine or chassis. The white wire connects to the throttle sensor. On my car it connects to the black/white wire right behind the throttle unit itself. Finally the red wire connects to the switch.
To wire the switch attach one wire to one prong of the switch (it doesn't matter which one). The other end needs to go to a constant 12v source, such as the battery.


To install the nitrous nozzle you need a 7/16" hole in your intake. You want this about 6-18" from the throttle body. Take off your intake tube and drill a 7/16" hole, screw on the bulkhead fitting (mounting bracket). Make sure the intake is clean of loose metal form the drilling and replace the intake. The nozzle should fit perfectly into the fitting. It's a good idea to use LocTite, Yellow Formula 55 Thread Seal, TFE Paste with Teflon, or some form of thread sealant for the connections. People have had lines disconnect on them.


When programming, disconnect the nitrous bottle or use an empty bottle.
...and your done =) fully installed.
Please read the instructions on to determine the boost you would like to give your car 55 65 or 75HP. I would say start with the lowest settings first and work your way up .
As for timing..rule of thumb is retard the timing 2 degrees for every 100 shot or 1 degree every 50 shot. ZEX includes a chart for this. Please observe the chart to and make the appropriate timing adjustment..
Finally double check your work...make sure you have the "cold" spark plugs installed, and have a full tank of 92 octane or higher gas.
Go have fun!!
Overall rating 9
Installation: 8
Speed Enhancer: 9
Worth the price: 3
I recommend nos. It's a lot of money to invest, but its better then saving up for a turbo, intercooler and all that other complicated stuff. Nitrous provides enough speed when you really want to go... otherwise our 5SFE engines can do the rest on city street driving.